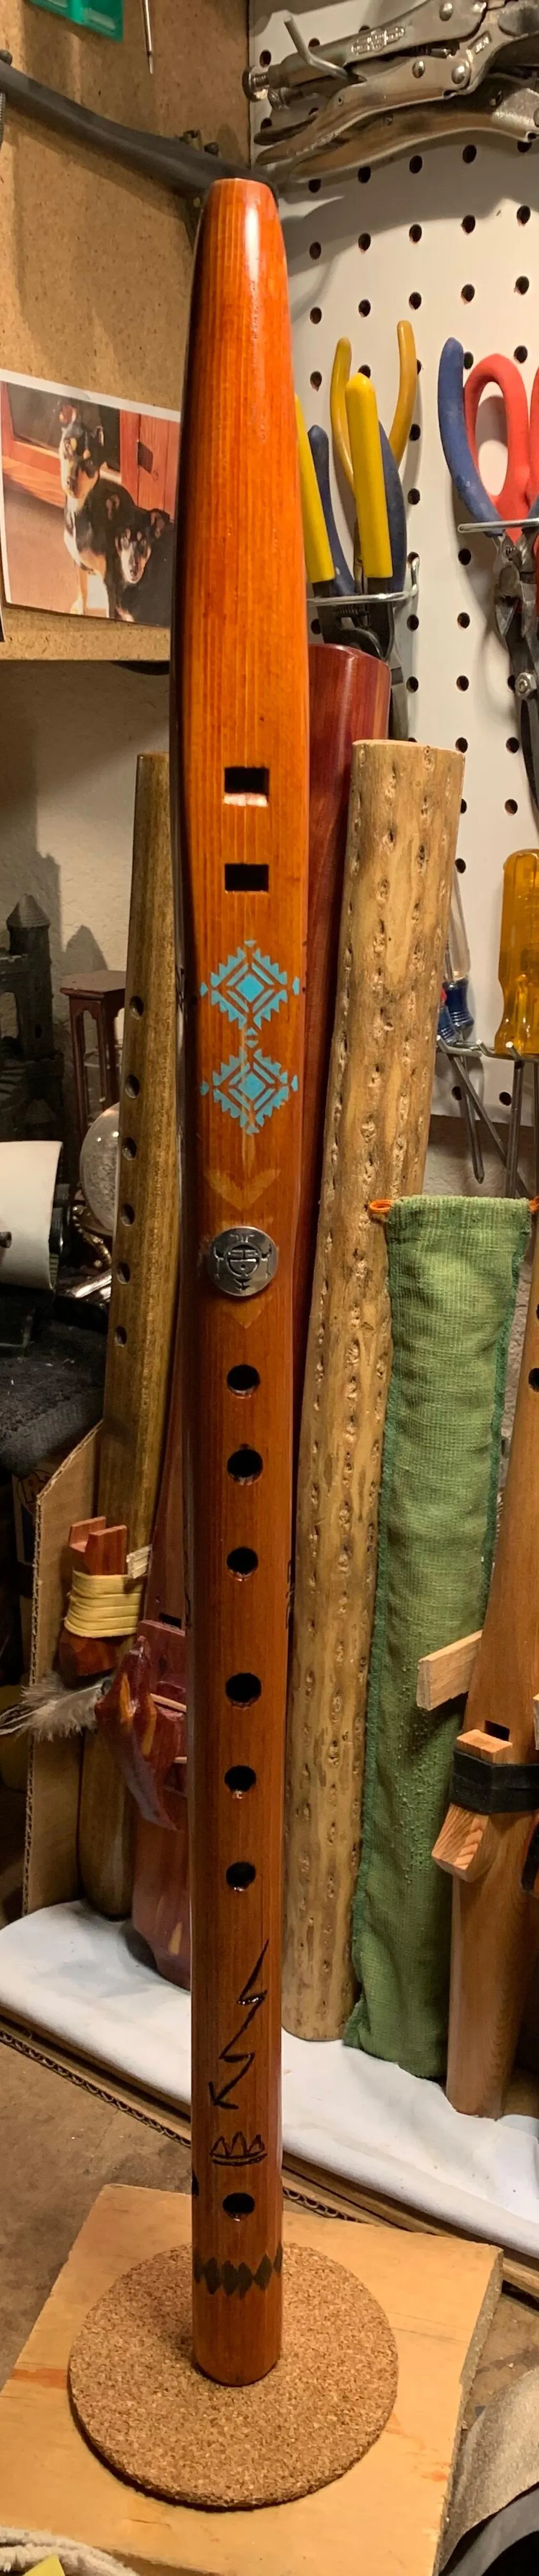
Meet our Pre Bored Native American style flute making kit.
This is our most advanced woodworking kit, ideal for confident woodworkers with fully equipped shops. The kit includes a set of western red cedar flute halves, a flat block base, a larger carving block, a leather strap, and a booklet with instructions and measurements for completing a flute in the key of A, G, or F#. The flute halves have been bored to a 7/8 inch bore diameter and have had the fipple holes precisely routed. The fipple holes are often referred to as the sound holes, not to be confused with the finger holes. This kit is long enough to make a flute in the key of F#, but can be cut down to either the G, or A flute length depending on what key you are interested in making.
Below this product you will find some pre cut animal shapes that can be substituted for the included larger block. If added to the cart we will replace the larger unshaped block with the animal shaped block.
The two include blocks both have the precisely routed groove in the bottom. The small flat block base is ideal for quickly rubber banding on during the tuning process, but after the flute is finished it is wonderful for gluing objects to. Consider attaching a carving, a small piece of driftwood, a gemstone, or a small sculpture to this block to adorn your new flute!
The larger carving block is shaped in such a way that it will not impede the air flow of the block and it is large enough that you can carve many interesting things out of it.
Scroll down to the bottom of this page to watch a video on completing this kit.
What’s involved in making a Pre Bored Kit into a Flute?
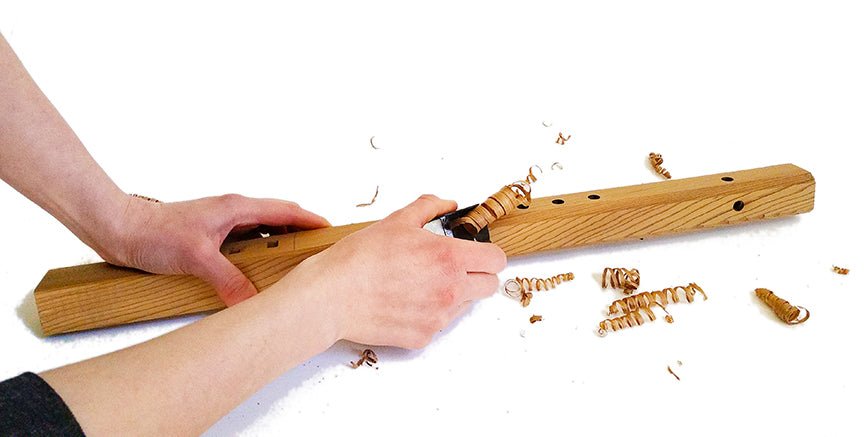
-Glue the flute halves together using wood glue and spring clamps
-Sand the outside of the flute blank once dry to remove the glue bead and even any irregularity.
-Perfect the fipple holes using metal files
-Measure and pre drill the fingering holes and four direction hole using the provided measurements.
-shape the flute blank to the desired shape using either hand shaping tools or a lathe
- fully hand sand the blank down to 180 grit (it will need to be touched up after tuning, so don’t bother sanding with 220 grit yet)
-tune the flute using the instructions provided
- finish sand the flute and prepare for varnishing/oiling
- apply your desired finish to the inside and outside of the flute (you must apply finish after the flute is glued because the glue seam needs to be sealed to avoid delamination)
-carve your block avoiding the groove
- apply desired finish to the block
-Enjoy your new flute!
As you can see from the directions, this is not a quick or easy process. It may seem tempting to buy this less expensive kit to save money, but after buying all the supplies you need to complete it you may find that it was not the less expensive option after all!
If you are stuck along the way, you can always use the contact form to email us and we will help guide you. Most mess ups are fixable!
We offer free lifetime support and repairs on all of our flutes, and we are happy to exchange your flute if it isn't the right fit for you. Buy with confidence and start your flute playing journey today!

Looking for a way to gussy up your flute? Our unfinished flute blocks are the perfect accessory for the woodworking enthusiast! These animal shaped flute totems are unfinished, rough shapes, with the groove in the bottom milled and sealed. Get your carving tools! These blocks need to be shaped, sanded, and varnished!
Add extra details by wood burning, painting, staining, and inlaying stones into these cutouts. We’ve done the precise groove milling, so these are ready for your creativity to take flight!
The groove in these blocks milled to a 7/16ths inch width which is perfect for all three of our flutes making kits as well as any Premiere or Beginner flute in the keys of A, G, F#, F, E. You can double check with me before purchasing or measure your existing flute to make sure the width of the sound hole matches the 7/16” wide groove in these blocks. Some stellar flutes in D, C, and B will also use this size of block, but it is best to ask before buying!
When sold separately these blocks will come with a piece of leather for tying the block on, when added to a kit order, they only come with extra leather upon request since the kits already come with leather.
Promotions, new products and sales. Directly to your inbox.
Just finished my flute. Tuned it to F# with the help of an app. which was challenging but with the help of your online tutorials I was able to make a flute that’s both beautiful to look at and to play!
I am having fun making my flute. Your video instructions are great! Thanks for this fun project!
Yes, I loves these prebored flute kits. They also smell very good. The smell of cedar is so good, it brings me a sense of peace and harmony.
Fast delivery, instruction booklet very helpful and quality sound out of the box. Still sanding but while taking a break I'm learning how to play it. Very satisfied!
Pre-Bored Flute Making Kit
Search
Newsletter Sign-up
Contact Us
Shipping
Returns And Refund Policy
Terms of Service
Privacy Policy